


Achieving Your Dream Space in 5 Steps (a sneak peek into our process)
Probably the question we get asked more than any other is, “Where do you start a project?”
We’re not surprised… It can feel very overwhelming to think of a renovation… or a new build…. or a large decorating project (… sometimes even those smaller projects) because, simply, it’s hard to know where to start! In this post we’ll take you through our process for a standard project and break it down for you in 5 basic steps so you can create your dream space!
But back to that question… Where to start? The answer is to always start with your personal style. This is our first step of any project! You can’t make many decisions until you decide on what style you envision for yourself. We can appreciate or be drawn to many different styles– but what is that style you want to come home to every day?
How about this?!
If a client is undecided what style they like or even if they do know their style, we try to get them to set up a Pinterest board. If a client says they like “west coast modern” we need to see what west coast modern means to them. It may be different than what we are thinking. This puts everyone on the same page with visual examples of what they’re attracted to. We will tell people to “pin” images they like even if they don’t know what it is they like about the image. Often it is the feeling that speaks to us. This really helps narrow down our individual style. Below is a sampling of a few of our pinterest boards…
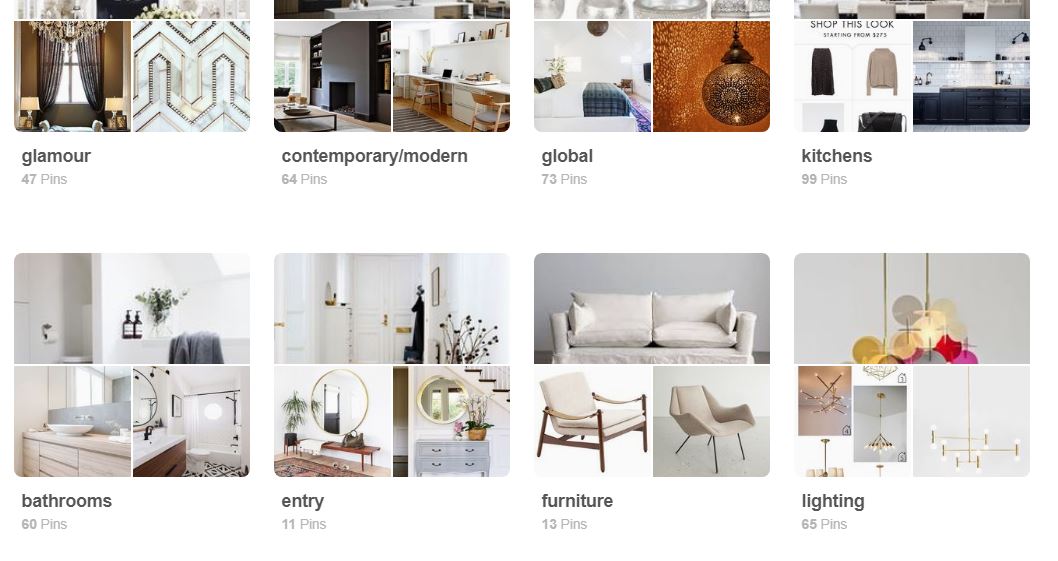
Pinterest is a good addiction (for us at least!) It’s such a helpful tool to organize inspiration boards and find things you didn’t even know you liked until you saw it! Check out our Pinterest here…
We are all drawn to many different designs or styles but by actually defining the style you want to live in, it helps eliminate about 75% of choices!! It is a huge step and super helpful to define your direction before you start any project.
Once we have an overall design direction from our client we need to come up with a cohesive plan. For example: if we get called in to do a kitchen renovation, we will look at the rest of the house as well. This is not to get the client to do more work but to help them come up with a long term game plan for their space and make their investment last as long as possible. We would never want to put in a dark masculine kitchen if the rest of the house was light and airy. Even if that is what the client wanted, we would give our feedback and point out that it is best to keep a certain continuity in their space. In our initial consultation report we may give ideas for other areas of the house that would help tie in their design style better.
So let’s say we are just working on a kitchen. The first step would be to get the client to “pin” ideas to a board so we can see what they like. Then we get a wish list from them. What would they like the kitchen to have? Is a wine fridge a must? Or two ovens? Which items are absolute must haves and which items are more of a nice to have? How many cooks are there? Do they entertain? How many people live at home? These are all very important questions when it comes to planning. We don’t want to use a 30” fridge if it is a full house or entertaining is a common occurrence.
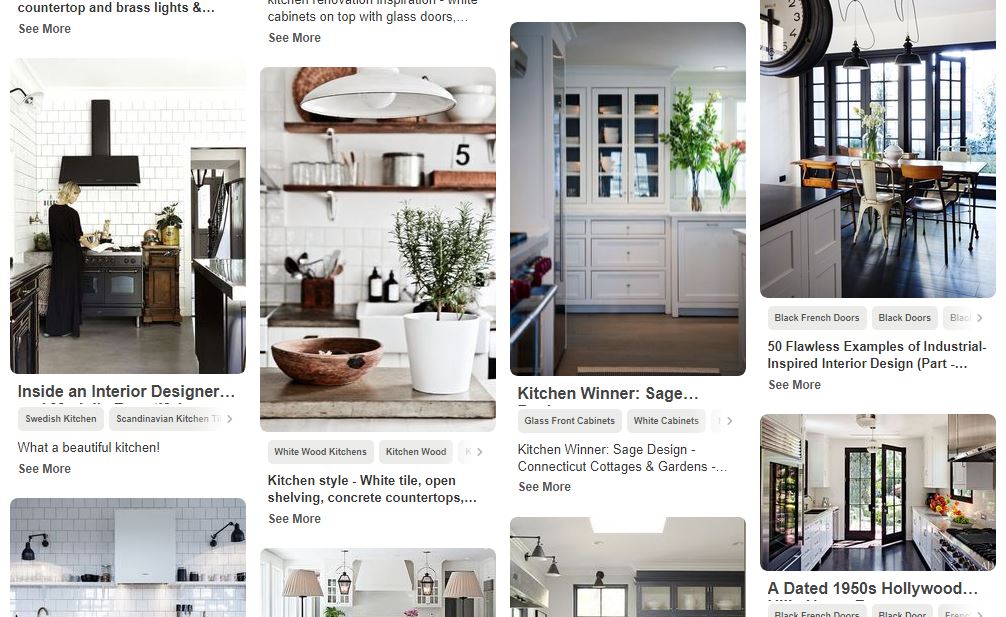
What to include? Does our client need a little or a lot of storage? Is it an eat-in kitchen or is there a separate dining area? It’s always good to mix inspiration boards with both functional ideas and visual inspirations…. It’s also wise to make notes about why you chose to save a particular photo (did you like the potted rosemary or the open shelving?)
Once we have a design direction and a wish list we will return to the drawing board in our office and start the space planning. Where do these items best fit? What is the best traffic flow? How does the room function best? Do all their “wish” items fit or are we going to have to re-evaluate? Note: it is very common to re-evaluate!
We will do very preliminary plans (called schematics) to show to the client before we do any final planning. We also will do some initial specifications- ideas of finishes they might like to choose. Once we have pulled all this together we will meet the client to review this. We discuss the schematic plans and specifications, offer our recommendations and get their feedback. This really helps put everyone on the same page and gives us our direction. It is also a time for the client to get really excited with the project as they now have visuals that can help them visualize their new space!
After basic schematics are drawn up we can look at options for our clients in a 3D model. For this client’s fireplace we have a closed storage view (left) and the same view with open storage (right). At this point we can alter the plans to better fit with the client’s lifestyle, budget, and vision for the space
Next up, we need to flush out all the ideas that the client has decided to move forward with. This might be a time when we meet with a contractor to make sure we can do the ideas we are thinking. Contractors are VERY valuable. We learn so much from our contractors on every job! At this time we also get precise with the plans. We need to draw up millwork plans if we are doing millwork, plan exact finishes to the spaces and figure out exactly which items work in the space, the design direction, what the client will like AND what fits the budget. We will also review lighting at this time. Is the lighting adequate or does it need to be upgraded? Note: it almost always needs to be upgraded!
Now we have a plan to help everyone move forward. The bigger the project, of course the more planning that needs to be done, and often more revisions and consultations– you have to make sure everything is exactly how it should be!
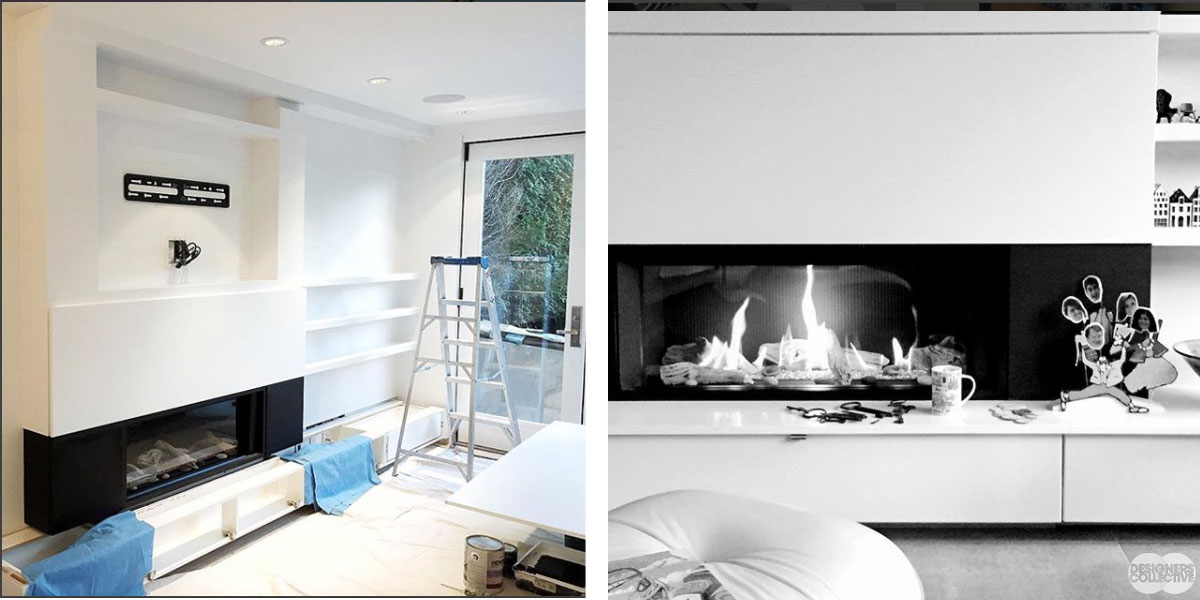
Here is our same fireplace project… in progress! On the left we have a mid-construction view, and on the right we have the finished product complete with a few family touches
Alright, now that we have that sorted– what about smaller projects? What if you have something you want to DIY? We have a great process for each project that is pretty automatic at this point– but realize not many people work through creative projects as often as we do! So, we broke it down into 5 straightforward steps– it’s a tried-and-true method that will help you get over the hump of I-don’t-know-what-to-do and get cracking on that project!
Step 1: Determine the Look and Feel.
“What’s the look I’m going for? What do I want the space to feel like?”
Make a list (or if you’re like us 3 or 4) to note down what you want your space to look like and the feeling you want it to have. Think of and answer questions like: What do you want the space to feel like? Is your space calm, relaxing, restful, serene OR vibrant and energetic? What is the space used for? Who uses this room? What is your wish list? What is your “must have” list? What are looks or styles that you love?
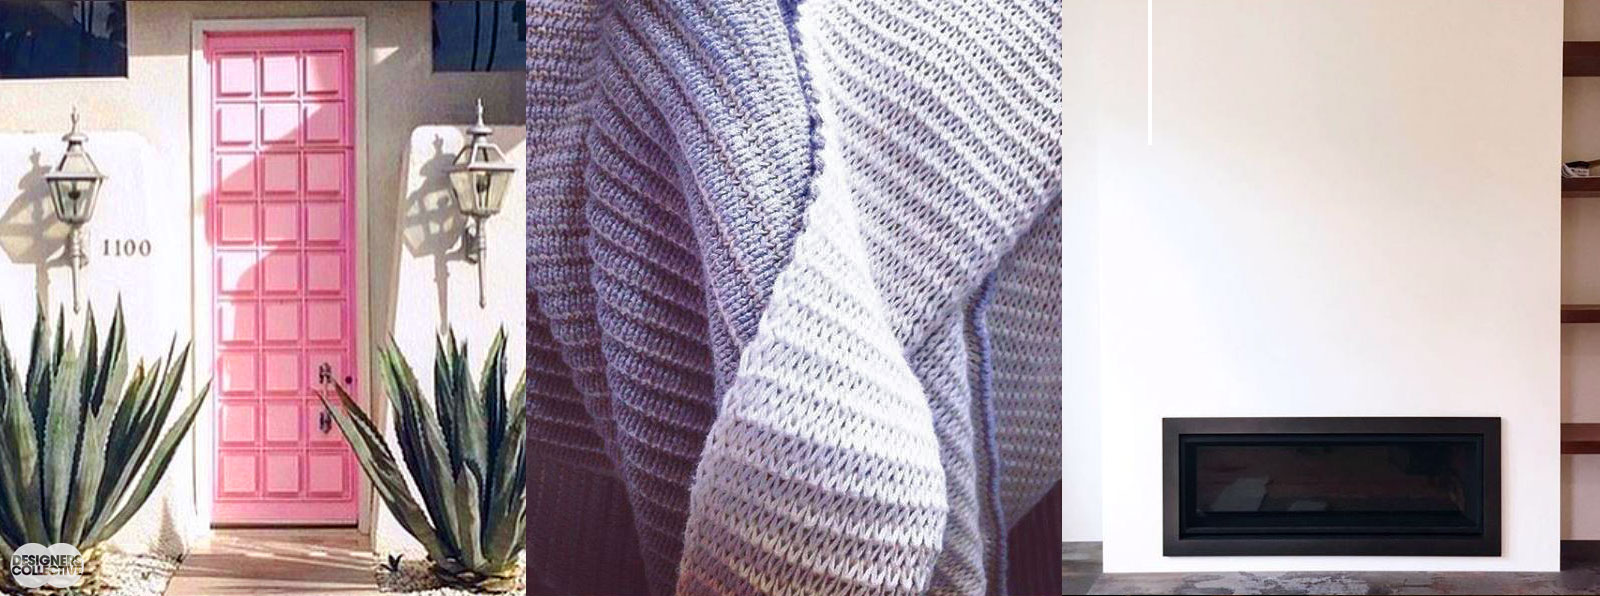
Do you want to come home to (from left to right) bold colours and unique architecture? Something soft and cozy? Or a clean modern space?
Step 2: Make an Inspiration Board.
Pin, pin, pin! Pin or make an idea board on Houzz, or even save pictures in an ‘inspiration’ folder. If you don’t use a computer, you can do the exact same thing with magazines– cut out your ideas and put them all together on a board or in a binder. Think about (and, if it helps, jot down) What do these images have in common? What are the common threads? This will help you determine the design direction you want to go. Now you have just eliminated the 75% that does not apply to you! Whew! That is a huge stress reliever!
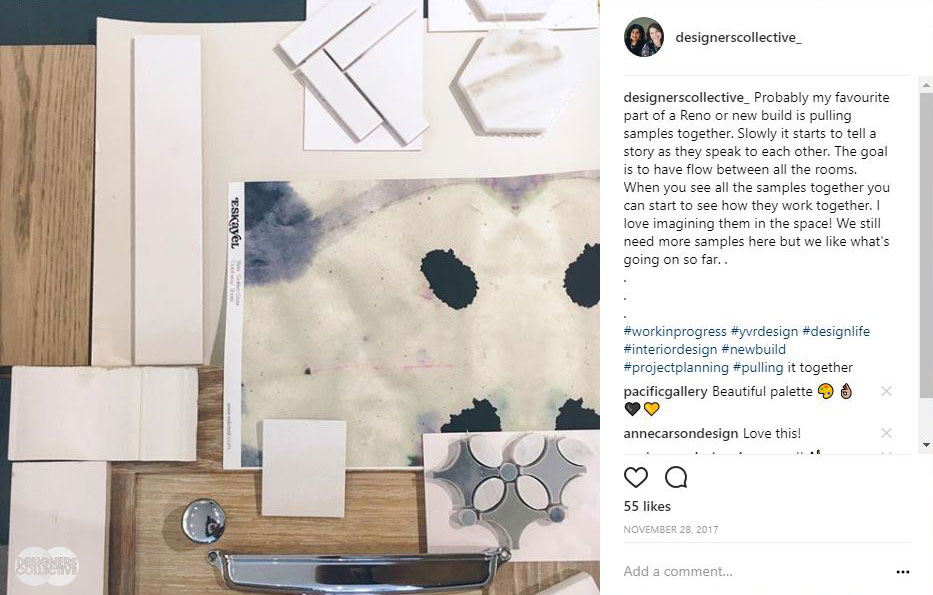
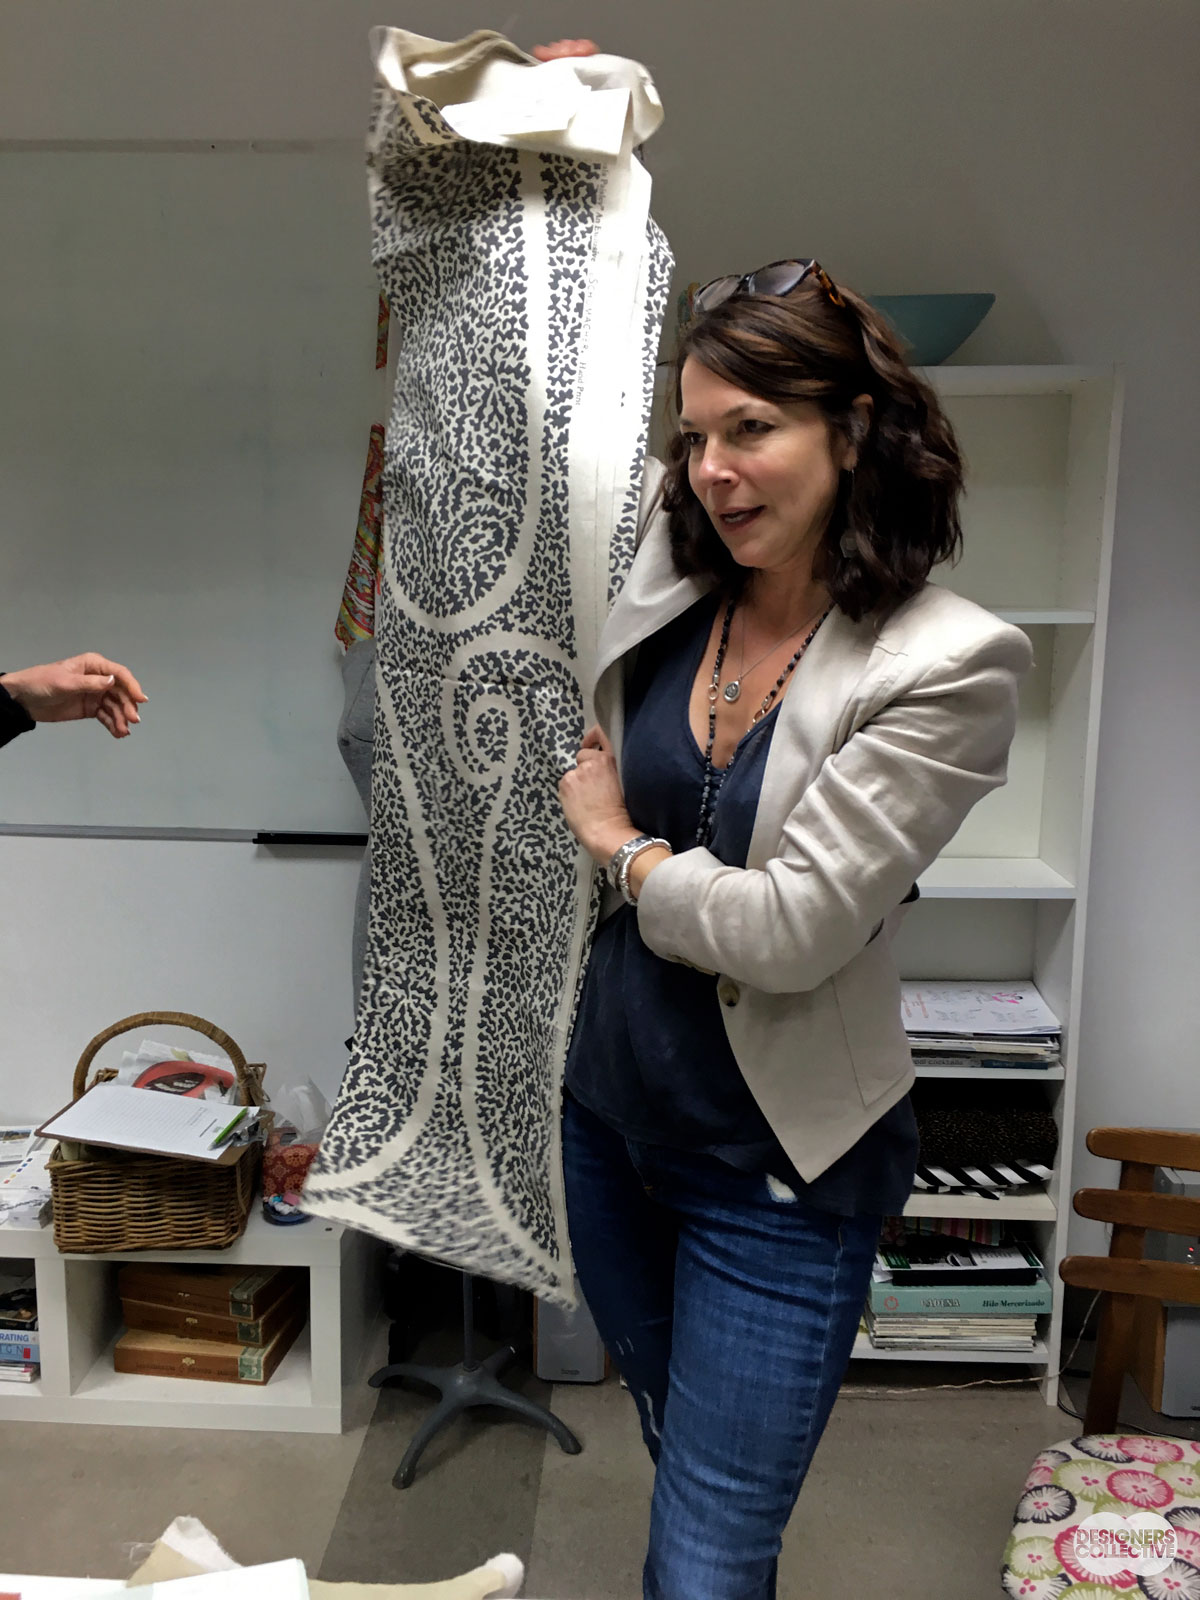
Pulling together paint chips, textiles, and finishes for a client means we’re able to better visualize the space and the final product!
Step 3: Plan like you mean it.
Seriously– Plan. Plan. Plan. Come up with specific items you want for the space. If you don’t know how to draw your space and corresponding furniture/items up on graph paper, then measure it out in the space to make sure it fits. Using green painters tape and actually taping out the specific pieces and where they fit in a room can be a huge help. Plan as much as you can ahead of time and it will save you time, money and many headaches!!
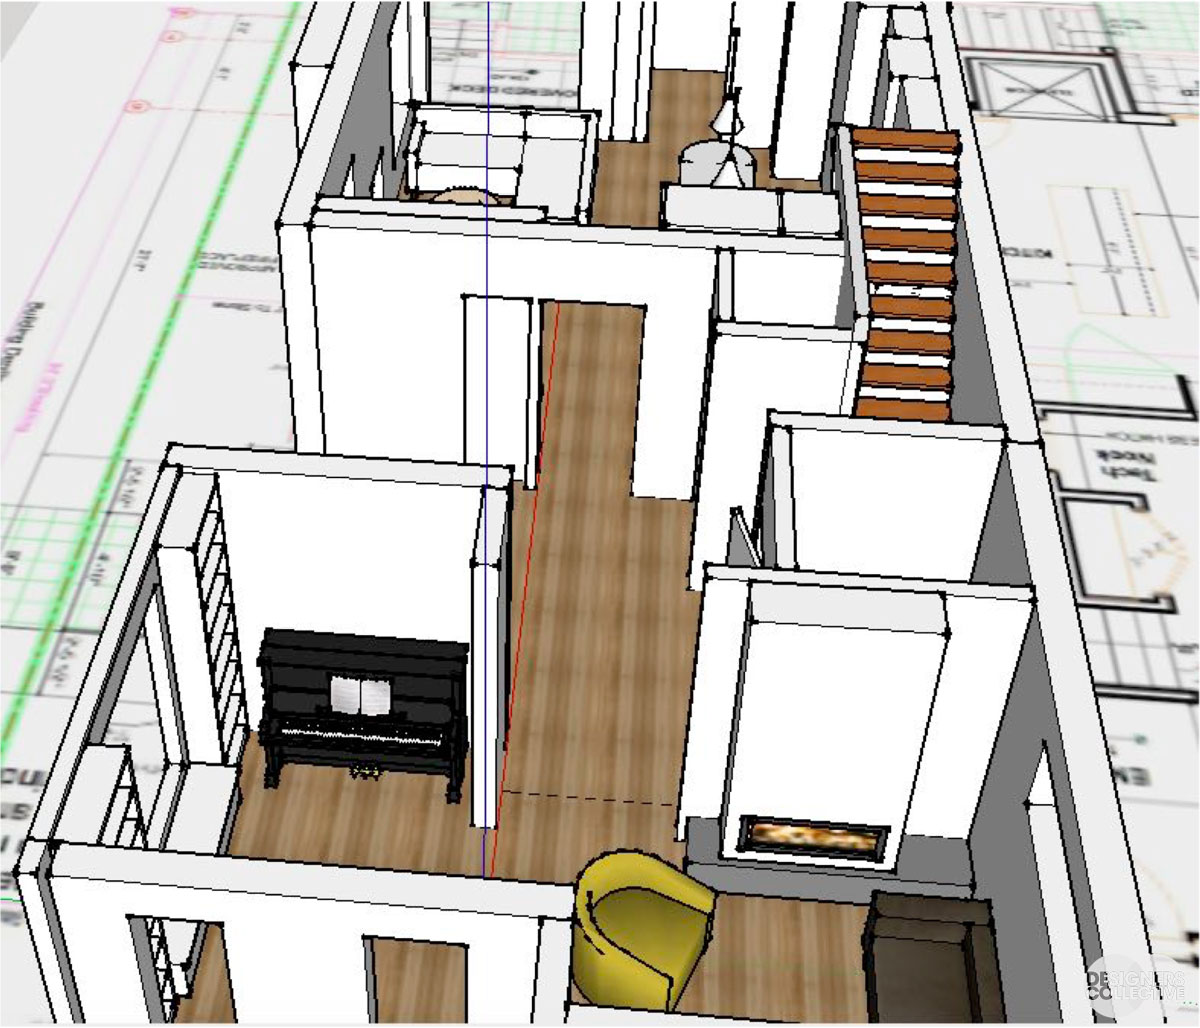
If you have access/abilities, 3D rendering programs are absolutely fantastic tools to really visualize how a space will come together
Step 4: Start to Implement!
NOW, finally you can start to implement your ideas. Start with the “envelope” of the space. Does it need to be painted? How is the floor? Does it need to be refinished or is new carpeting in order? Updating these areas first will provide a great foundation for your new look (also it’s MUCH easier to these beforehand).
If you can’t afford to finish the entire room at once, start with the big pieces first. It is better to buy a sofa you really like and is super comfortable than to buy a sofa you sort of like and isn’t as comfortable just so you can buy lamps as well. So buy the bigger pieces, then work your way to the smaller items.
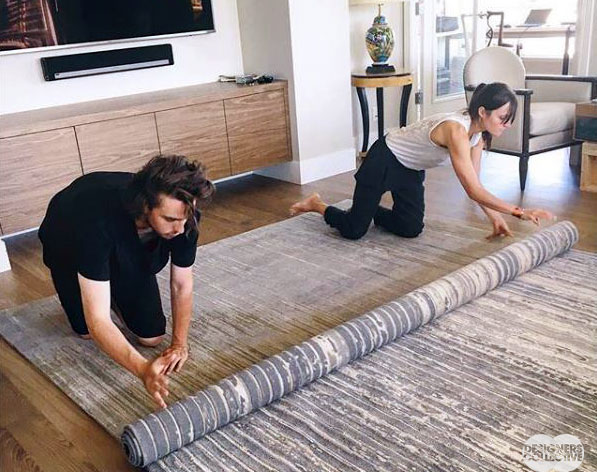
Here we are adding a gorgeous area rug to one of our projects midway through dressing the space…
Step 5: Accessorize your space.
This is often where people drop the ball. We get the space to 90% and we just don’t quite finish it off. This is what can make the difference between a nice space and a great space! You don’t have to spend a fortune to do this either. Inject your own personality by adding items from your travels or other heirloom pieces that speak to you. Adding these items is what makes our space unique to us. Fresh flowers or something living like succulents or a fig tree can also add a lot to a space.
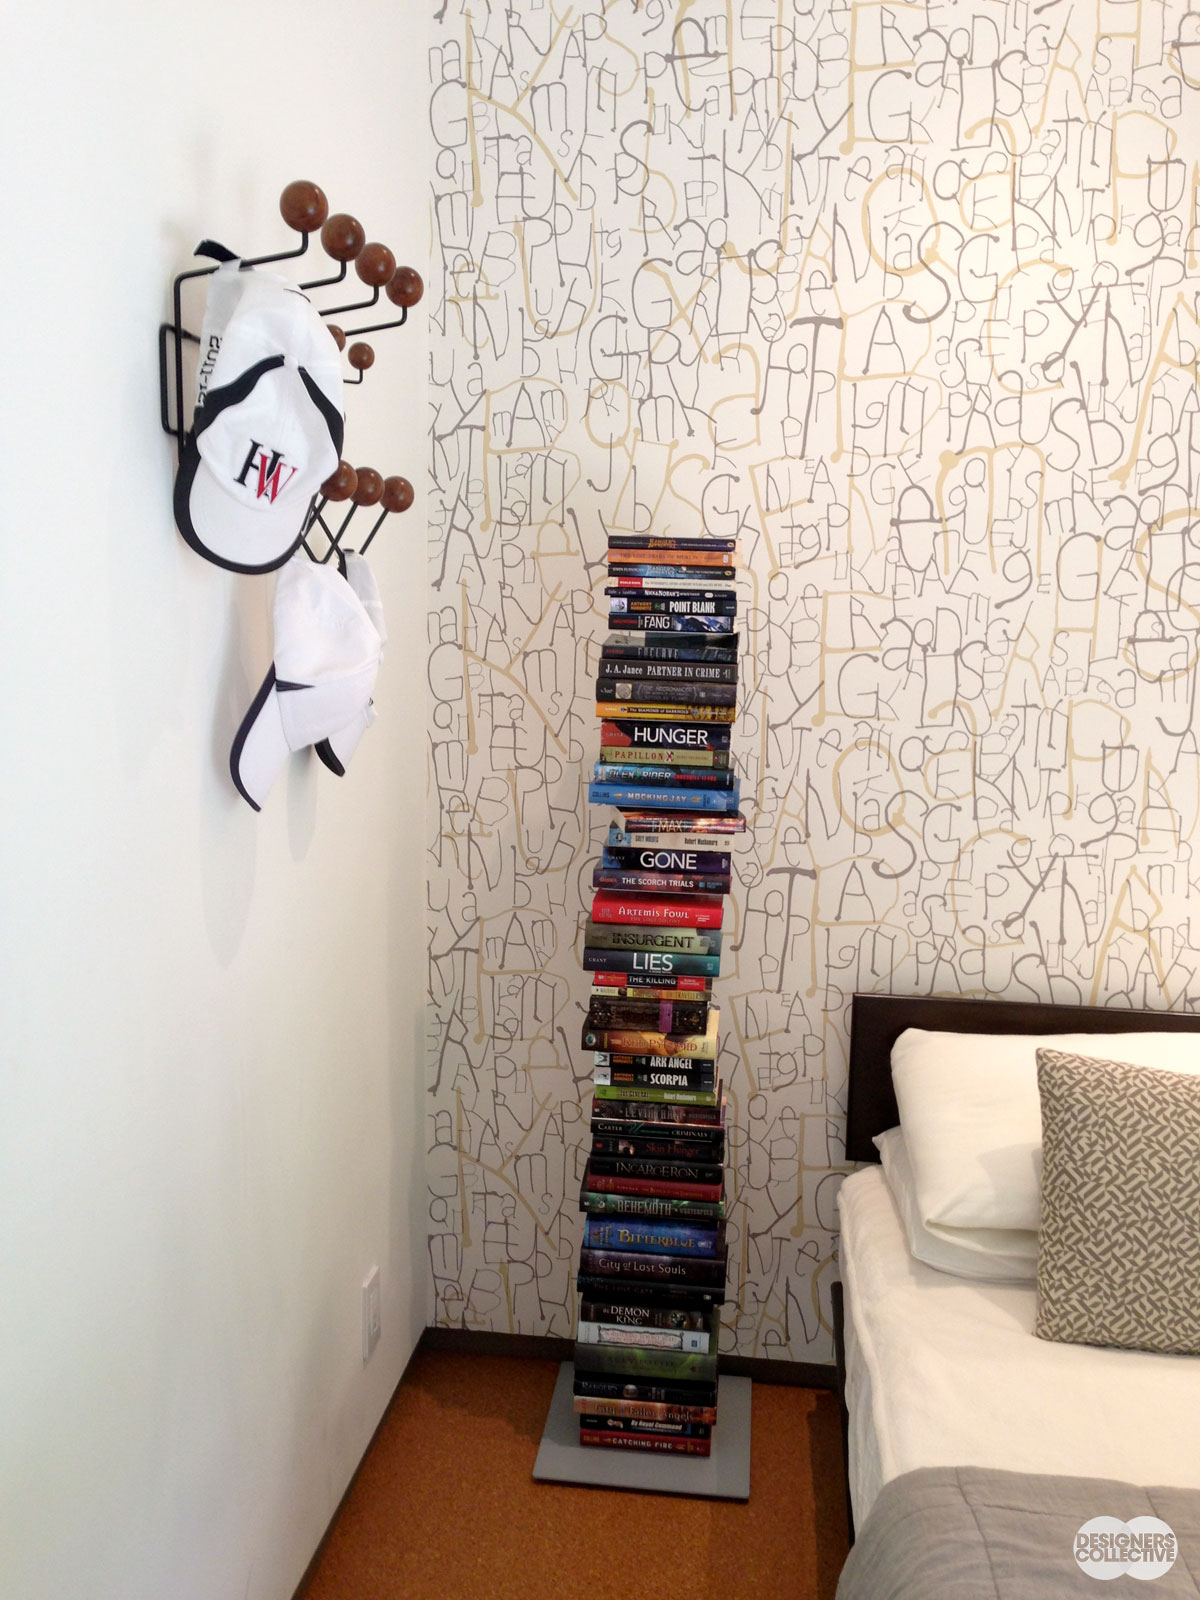
We love this floating columnar bookshelf– storage and a great visual feature all in one!

Accessories should add to the space and complement your personality! It’s the best way to avoid looking too much like a catalogue…
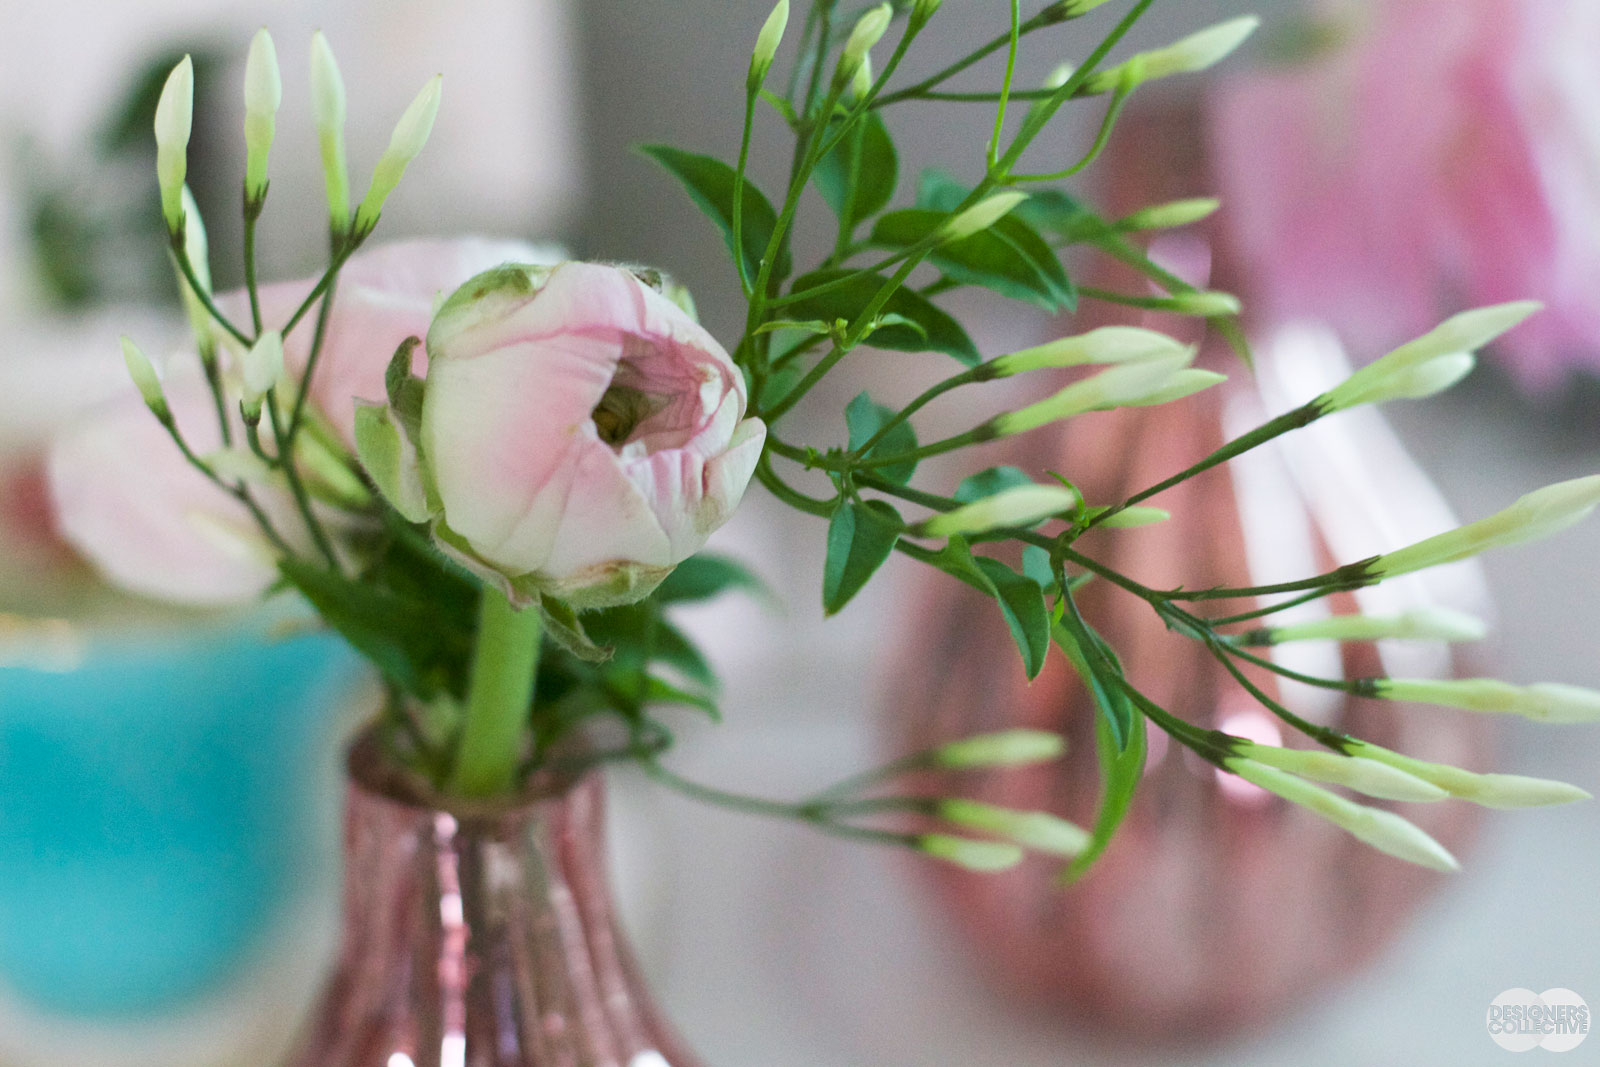
A little greenery is a nice touch too! Grab some of your favourite blooms and switch them out with the season…
We hope this formula can help you understand the process behind designing a space and give you some direction about where to start. AND if you need some help, we are happy to help you design the space or have us in for a design coaching consultation to help you get or stay on track!