


The Busy Guide to Pumpkin Fun
Halloween weekend is just around the corner!
If your schedule looks anything like ours, there seems to be few (if any!) free slots that you can dedicate to the sometimes labour-intensive process of carving pumpkins… So we compiled a few ideas to efficiently decorate pumpkins for both indoor and outdoor décor, as well as some tips to make the most out of a pumpkin if you can get around to the cutting and carving! Whether you need something quick, quicker, or in the quickest time possible, we have a few suggestions.
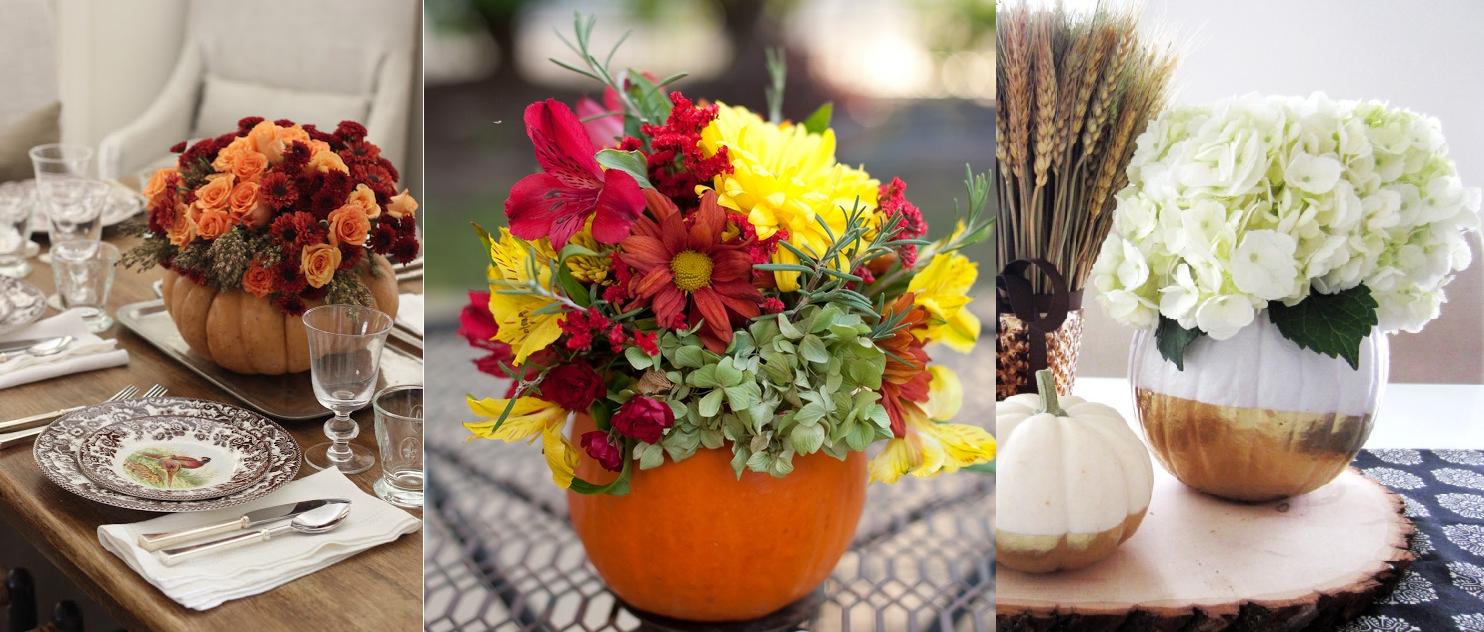
Quick: A Natural Vessel
If you have a great autumnal bouquet, a small or medium pumpkin can become the perfect vase. Start by cutting around the stem to create a vase-like opening (fit in a small can so stems can be in water). Remove the pumpkin seeds with a spoon. Trim flower stems to fit your pumpkin. For a clean finish have the outer layer of the arrangement resting near the edge of the pumpkin or loop some foliage around the base of the stems.
Autumn-inspired colours, petite showstopper, and a gold-dipped centerpiece
Alternative: Cut the opening so it will hold up a small mixing bowl. Fill with festive treats for a tasty centerpiece.
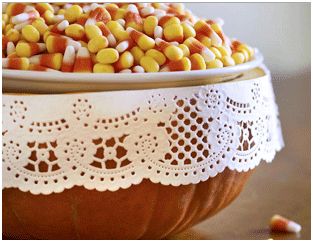
Shown here with an added touch of lace
Quicker: Surface Treatment
We love painting as an alternative to carving. Really, there are endless options for painting a pumpkin from colours to patterns and a multitude of finishes. This is probably the easiest way to customize your design and if you’re comfortable with a can of spray paint, also one of the fastest!
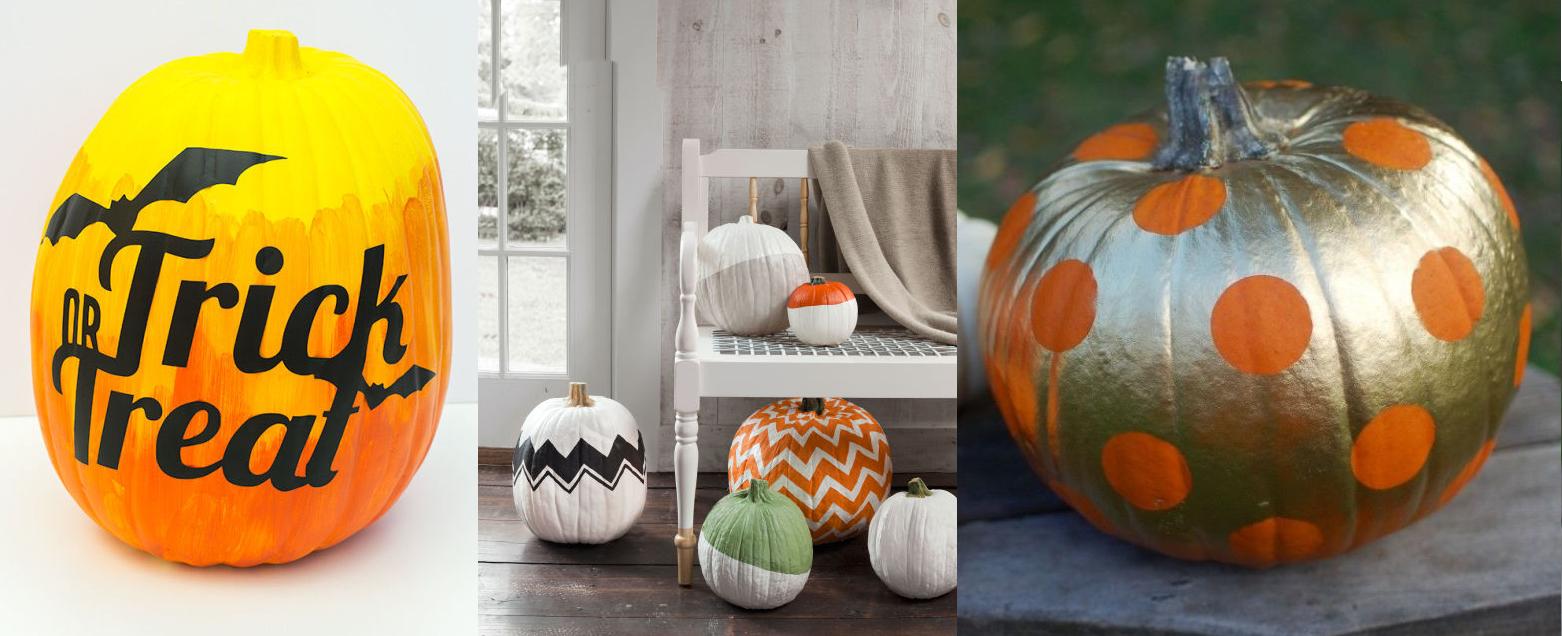
Examples of Ombre, Patterns, and Metallics found on Good Housekeeping
Have extra time? You can quickly embellish your design by nailing on decorative tacks, attaching ribbons or lace, or introduce some sparkle to give your pumpkin a bit of character.
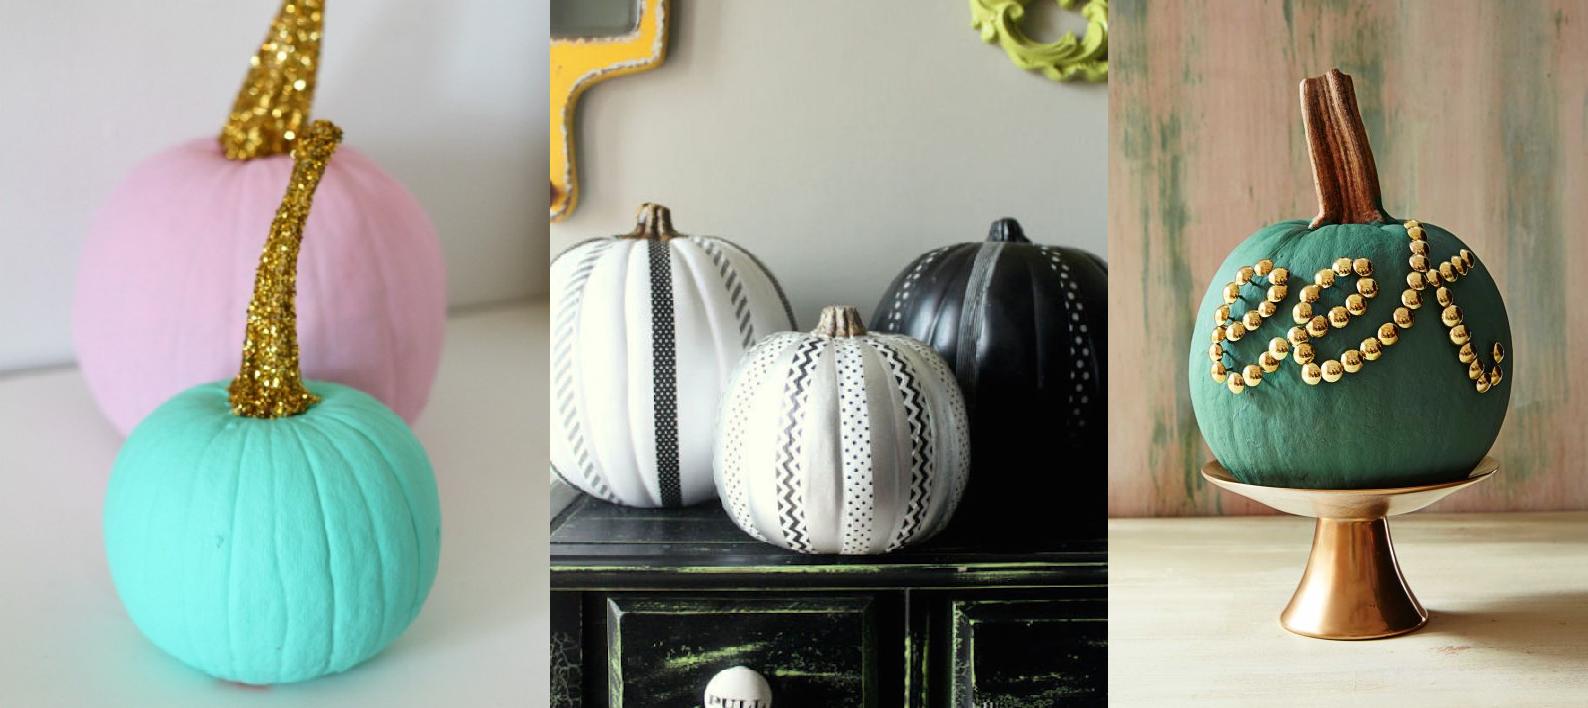
Pastels with glittery stems, monochrome with ribbon, and a festive use of tacks
Bonus: The inside is not touched! If you have time afterwards you can always scoop out the seeds inside for roasting. Scroll down to check out our DIY…
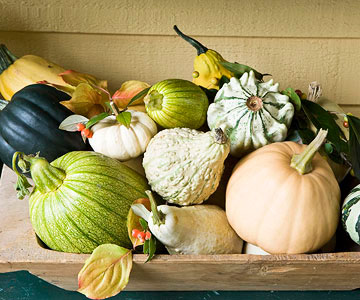
Quickest: The Organic Effect
Pumpkins come in an amazing variety of shapes and colours. Pick up a couple Sugar Pumpkins during your next grocery shop and while you’re at it look for gourds and squashes with a variety of textures and colours. These can be arranged for a table, mantel, or sideboard to add a subtle but festive touch.
See more ideas here
With Time to Spare…
If you find the hands-on aspect of carving a pumpkin appealing, the following are a few ideas to make the most of your pumpkin…
Prep your pumpkin by carving an opening: either lid-style around at the stem of the pumpkin or an opening at the back of the pumpkin for easier candle access. Grab a good spoon or ice-cream scoop and harvest the seeds inside.
⇒Roasting the seeds: Preheat oven to 350°F/180°C. Clean seeds of any residual pumpkin flesh and pat dry. Toss seeds in olive oil, pinch of salt and chosen seasoning. Bake for 10 minutes or until lightly golden brown.
Tip: As you scoop out seeds, place them in a bowl with a some water in the bottom, this will help loosen any lingering flesh that should be removed before roasting.
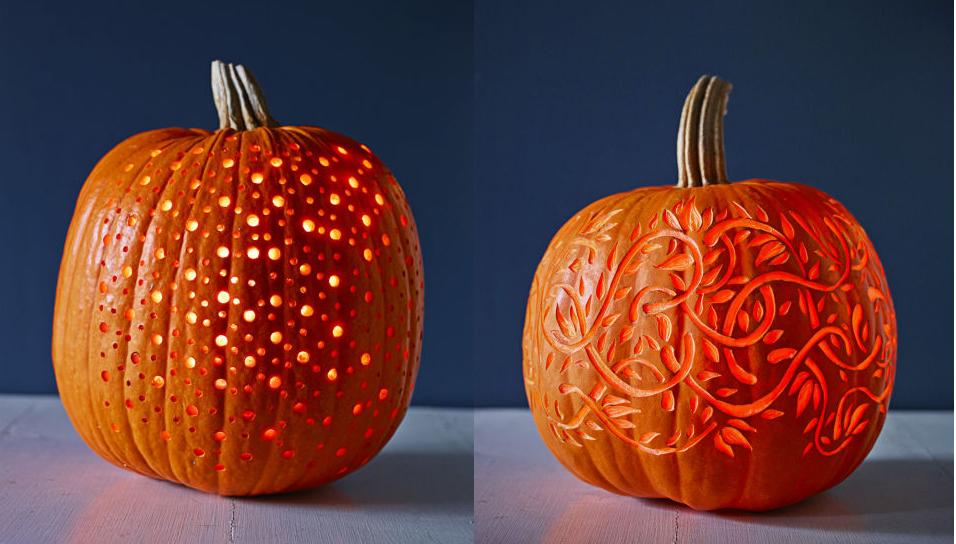
Instead of grabbing an assortment of knives, go for a power drill (eye protection and age-appropriate supervision recommended…). Map out a pattern with a sharpie or thick pen and go to town! The result is wonderfully lantern-like, and looks beautiful indoors and out.
Another knife alternative is to etch into the pumpkin with a lemon zester or veggie peeler. Test your pumpkin before placing it on the step to make sure the light illuminates your design through the flesh. Make the design easier to see with additional candles or go over your pattern again with the peeler of your choice.
Tip: We recommend to start with a simple design, extra details and touch-ups can always be added at the end (and if time permits!). Experiment with different sized drill bits or peelers for variety in the pattern.
Check out other carving ideas here
Once your pumpkin had fulfilled it’s Halloween duty, bring it inside to the kitchen. Roasted pumpkin is an incredibly versatile ingredient that lends itself well to soups, muffins, sauces, the list goes on!
⇒Roasting the Pumpkin: Preheat oven to 350°F/180°C (temperature may vary for different recipes). Divide the pumpkin into manageable pieces (sugar pumpkin = halves or thirds; large pumpkins = chunky cubes of equal size). Drizzle with olive oil and roast for 45-60 minutes or until the pumpkin is tender and the edges are just slightly browned. Remove from oven and set aside to cool. Remove skin and store in a container for up to 5 days in the fridge.
Tip: Size matters! Sugar Pumpkins (about 2-4lbs) have a more intense flavour and the flesh is not as stringy as larger varieties. Large pumpkins can be roasted (soups/sauces are a good destination for larger pumpkins as you can blend them into stock and develop flavours) but make sure you have the tools and the space to safely break them down into roast-able sections.
Happy decorating, roasting and snacking!
Pingback: DIY: Painted Pumpkin -
October 28, 2017 at 11:01 am