


DIY: Painted Pumpkin
Pumpkins, witches, ghosts, oh my!
Hallowe’en is creeping closer … in fact it’s only a few days away! If you want to add some oomph to your Hallowe’en decor, adding paint to your pumpkins is a versatile and fun way to decorate for the spookiest day of the year. You are free to play with colours, patterns, and textures without the labour-intensive process of carving (though there is something to be said about tradition…). This year we decided to embrace the paint and see what we could create…
For this DIY demo we decided to go with a small pumpkin as our base– this size works well for a small centerpiece, can be customized for a thematic place-setting accent, or can be used in groupings to decorate a mantel, front step, or party area. The great thing is that these simple steps can be adapted to a pumpkin of any size!
We decided to keep it simple but effective– a black pumpkin with a few bat friends as accents. Check it out!
Materials:
-Small Pumpkin
-Black paint and sponge
-Black craft paper
-Black glitter
-Craft glue
-Small paintbrush (for glue)
-Toothpicks
-Black Sharpie
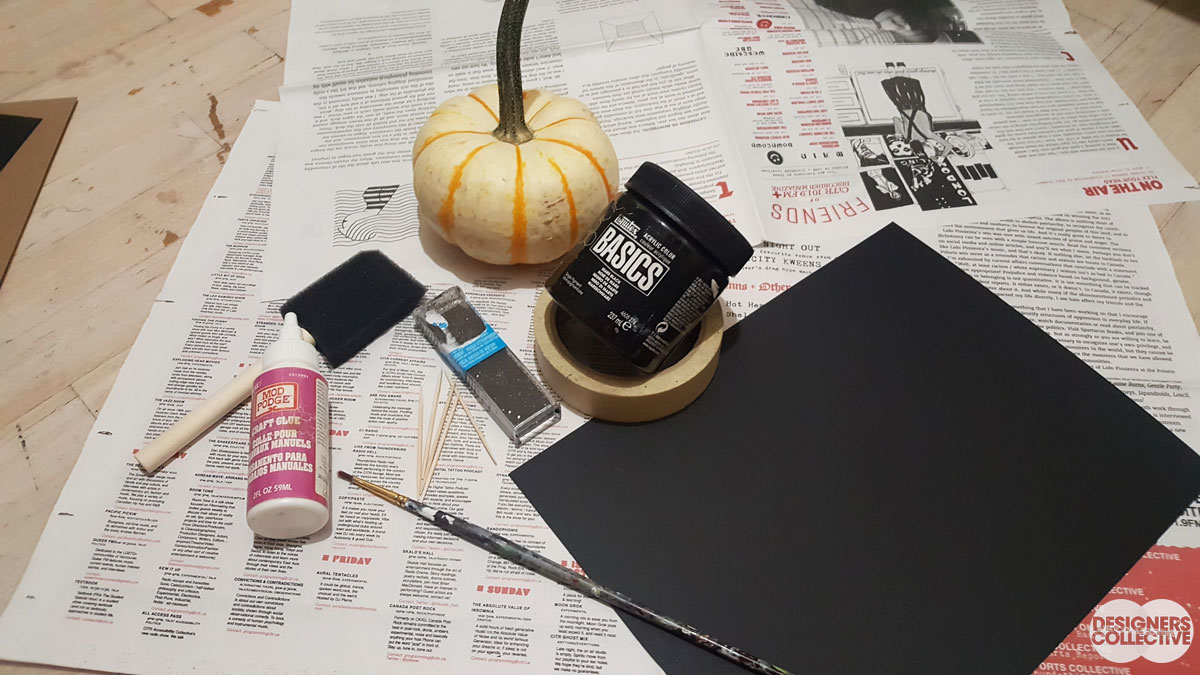
Have all your materials ready! A bit of newspaper goes a long way when it comes to clean up…
Step 1:
Wrap the stem of your pumpkin with masking tape (or painters tape!) to keep the paint from wandering off the pumpkin skin
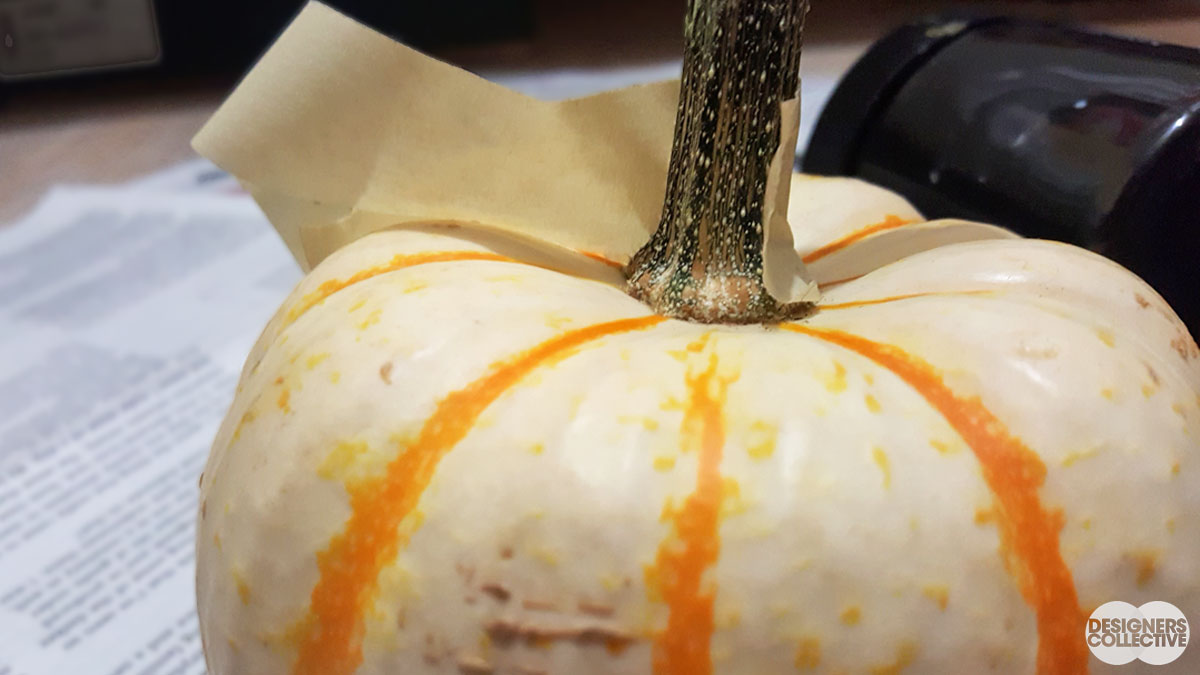
Wrapping the pumpkin stem…
Step 2:
Sponge on the black paint. We chose an acrylic paint– it’s water-soluble for easier clean up and has a quick dry-time. Don’t be surprised if you have to do more than one coat to achieve a nice opaque layer of colour!
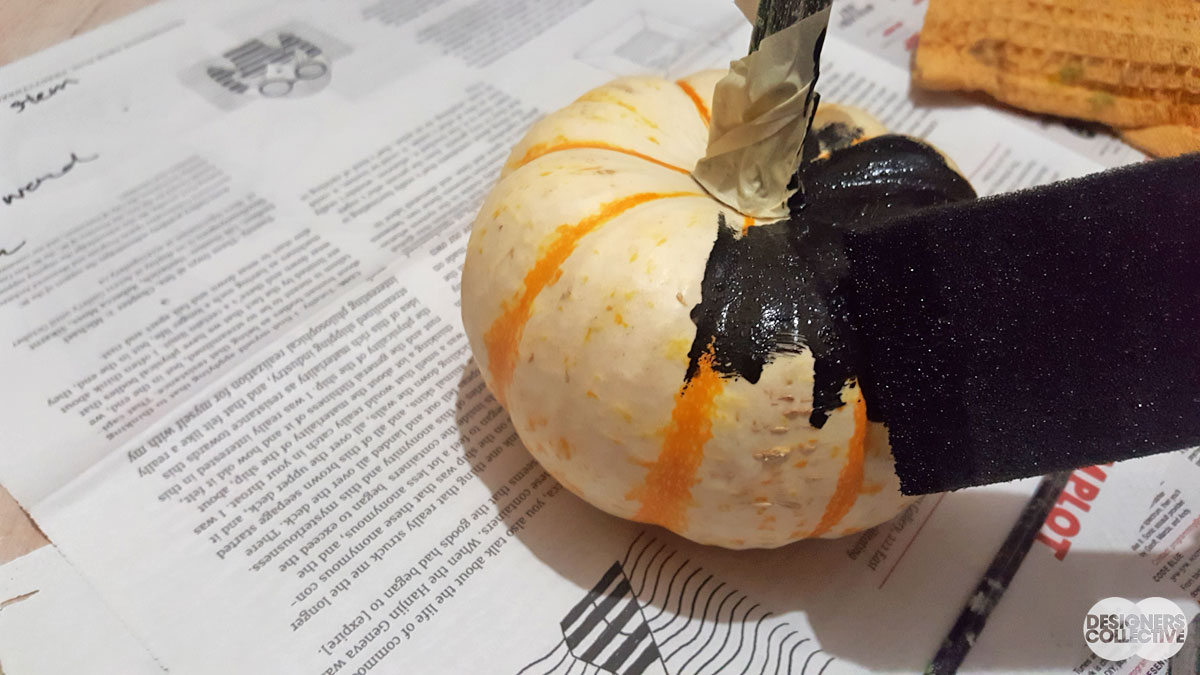
Gently sponge on paint, this way you don’t get streaky brush marks…
Step 3:
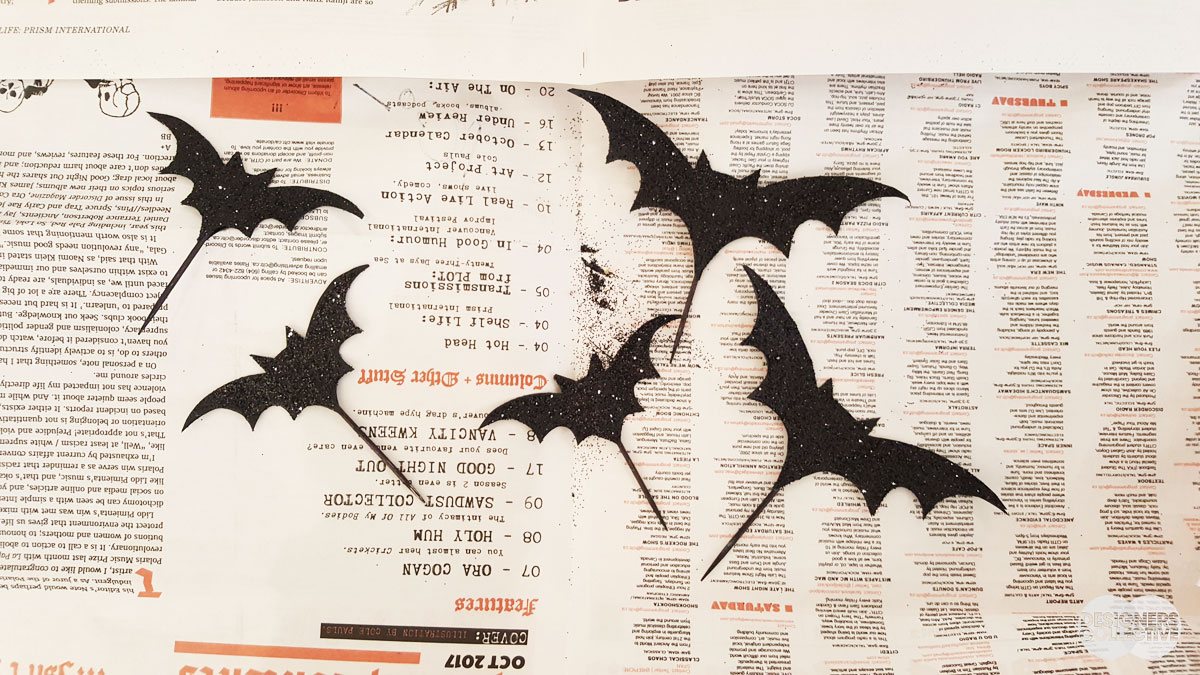
Using brown kraft paper we cut out a template for our little bat accents. Each “bat” requires 2 bat shapes and a toothpick (we quickly coloured our toothpicks with a black sharpie for colour consistency). We traced our template on to the black paper and cut them out. When you are ready to assemble your bats, sandwich the toothpick between a set of black bats. Using craft glue, adhere them together– the result will resemble a bat lollipop.
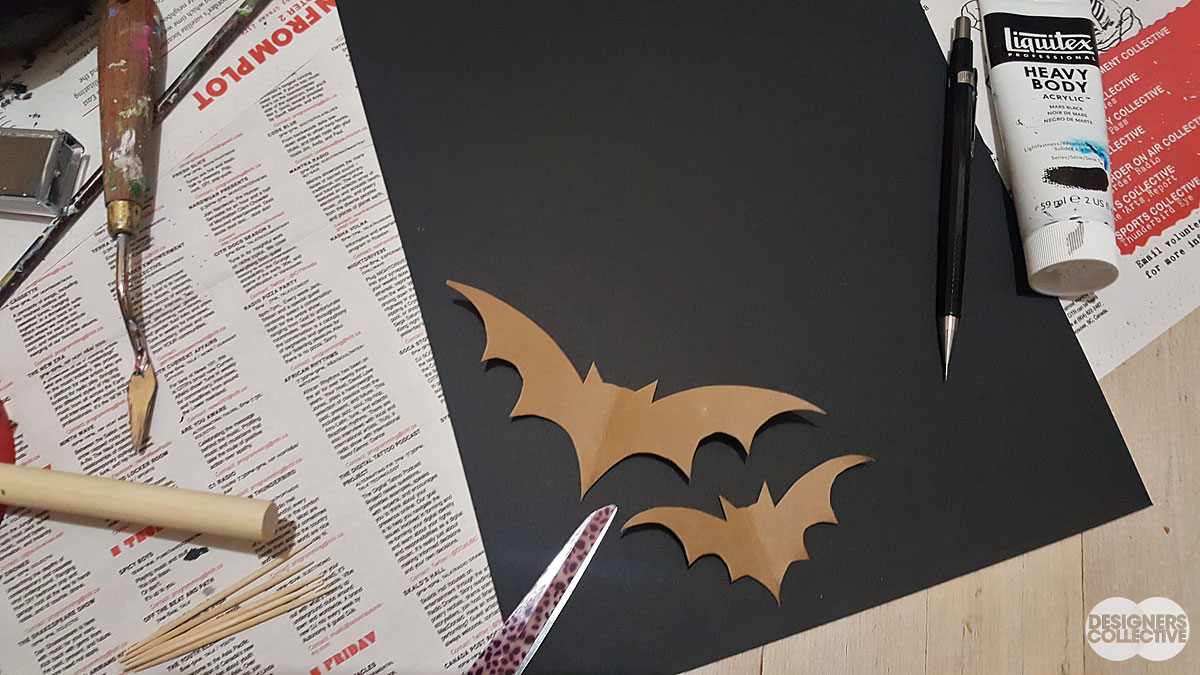
We chose two sizes of bats for a bit of variety…
Step 4:
Set out some black glitter on a piece of paper– make sure you have a nice thick layer. Then, use a paintbrush to spread a thin layer of glue on one side of your bat-lollipop. When the bat is fully coated in glue, press the glue-covered side into the glitter. When you are finished, tap the bat gently with a finger to shake off any excess.
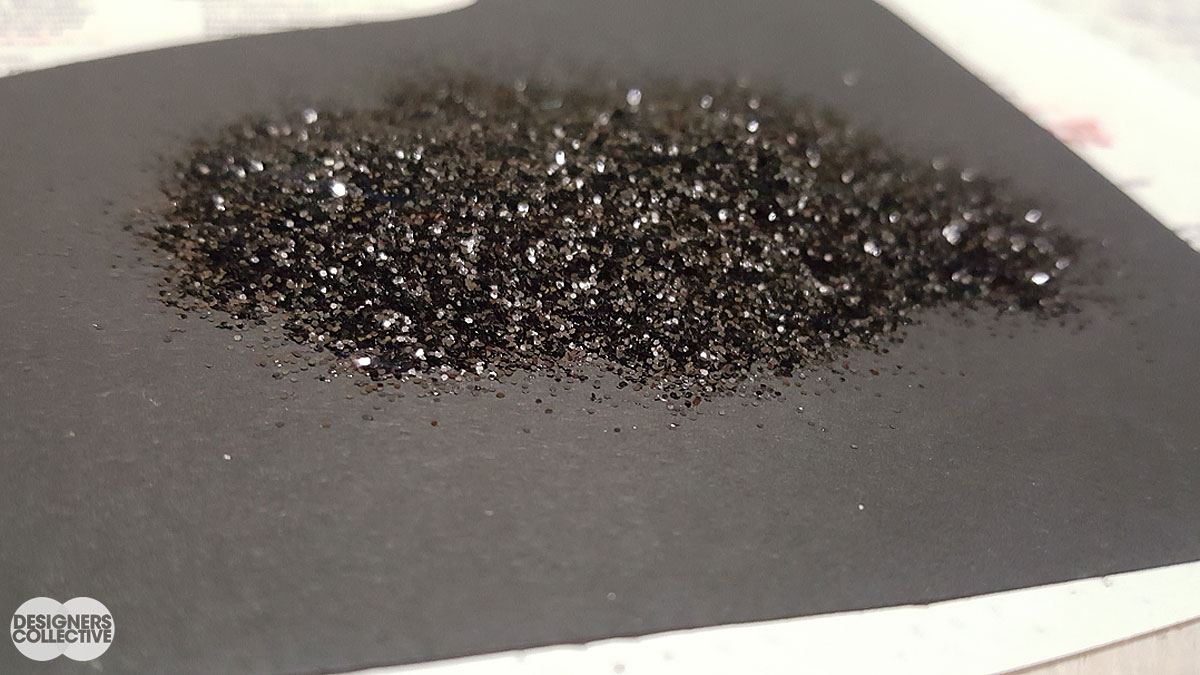
Glitter can get everywhere… place it on paper so any (clean) excess can be easily poured back into it’s container
Step 5:
Let your bats dry on a piece of newspaper (keep that excess glitter contained…)
Our bats are all dressed up and need somewhere to go…
Step 6:
Choose where to place the bats on the pumpkin– have fun with sizes and heights! When you have your placement, firmly press the toothpick into the flesh of the pumpkin.
Voila!
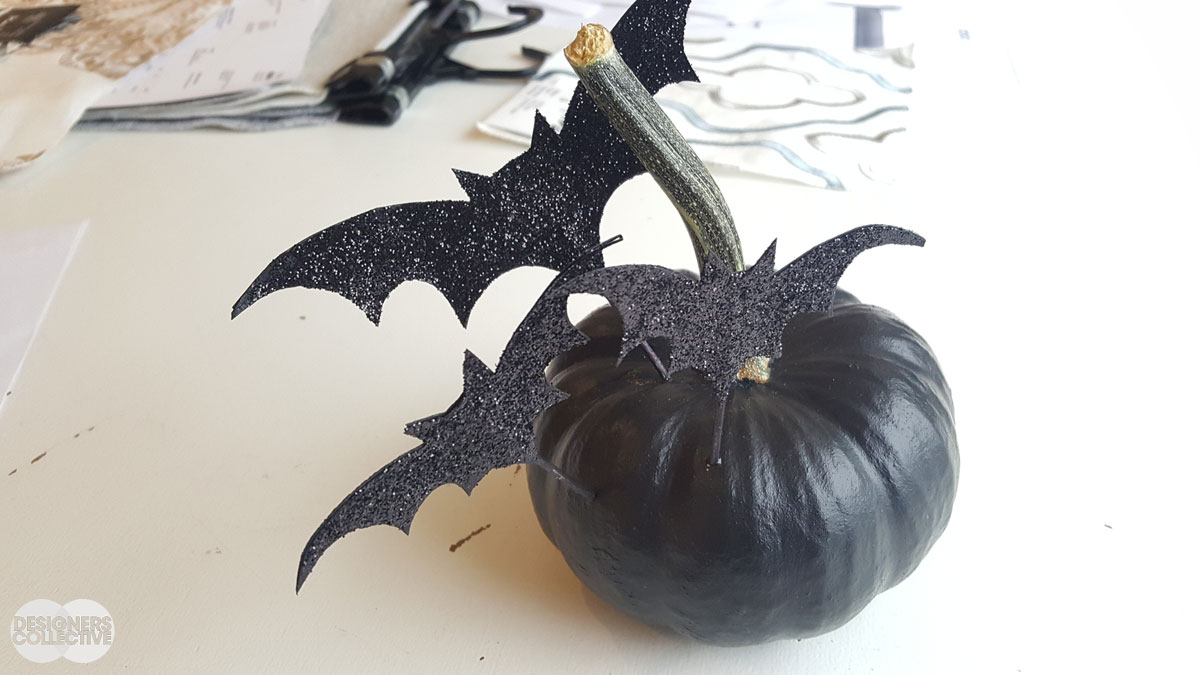
Press the toothpicks into the pumpkin, play around with size and placement…
The glitter is absolutely optional… we like the idea of a shiny surface to catch the candlelight during a spooky dinner party!
If you’re looking for more pumpkin inspiration before the 31st, take look at our Pumpkin Guide from last year (everything from a few decor ideas to tasty pumpkin recipes) or check out our DIY video on Pumpkin Votives!